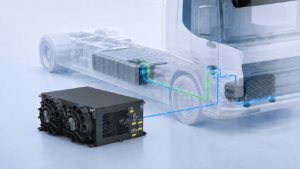
An OEM voltage-matching checklist for HVCH selection: actual supply range, conditional heating output, auxiliary power and configuration evidence.
A 400V or 800V label is a starting point, not a complete specification for a high-voltage coolant heater. Select an HVCH by matching the exact configuration to the voltage available at its terminals, the heating output required under those conditions, and the vehicle’s power and control interfaces. An 800V vehicle architecture does not automatically require every heater to operate at exactly 800V.
For an electric bus or truck project, the useful question is therefore not simply “Which voltage is better?” It is “Will this heater deliver the required heat throughout our approved operating envelope?” This guide helps you prepare that review before choosing a model from the EVLINK high-voltage coolant heater range.
Start with the actual supply, not the architecture label
Ask your electrical team for the minimum, nominal and maximum steady-state voltage expected at the heater terminals in each operating mode. Keep any transient requirements separate. A pack-level nominal figure alone does not describe the conditions the heater must accept.
Published manufacturer information illustrates this distinction. Webasto lists a 100–490V DC range for its 400V HVH 50/70 family. That is an example from Webasto, not an EVLINK specification or a range to apply to another heater. Use the datasheet for the exact part you intend to order.
Identify where the heater is connected. If its supply comes through an additional conversion stage, review the output of that stage rather than assuming it sees traction-pack voltage directly. Confirm which electrical operating modes are permitted: parked preconditioning, charging, driving and service may not share the same enable conditions.
Voltage compatibility and heating power are separate checks
A heater may be permitted to operate at a particular voltage without delivering its headline heating output there. Request a power-versus-voltage map with coolant temperature and flow conditions stated. If the supplier provides only one rated point, ask what happens at the lowest supply voltage in your vehicle envelope.
For a cold-climate bus, this matters most when available power and preparation time are both constrained. The thermal requirement should state the starting condition, target condition and allowed warm-up window. The electrical requirement should state how much power the vehicle can allocate to heating during that window. Neither team should silently assume the other has approved the full nameplate load.
Do not treat an 800V label as evidence of faster warm-up, lower energy consumption or longer range. Those outcomes require a comparison at defined system conditions. For the thermal calculation, use the separate electric-bus HVCH sizing guide; then check whether the proposed electrical configuration can support that requirement.
Check auxiliary power and communication independently
The high-voltage heating supply is not the whole interface. Record the required auxiliary supply, its permitted range, the communication protocol and the command sequence for the selected configuration. A similar enclosure or connector family is not enough to establish compatibility.
Webasto’s 800V heater family information describes model-dependent low-voltage and communication options. The practical lesson is to confirm these items at part-number level rather than infer them from voltage class. This example does not establish which interfaces an EVLINK model supports.
Ask who owns the heating request, power limit and fault response in your vehicle. Specify what should happen if auxiliary power is unavailable, a command becomes stale or the requested heating power exceeds the vehicle allocation. Have the supplier and vehicle controls team agree the response; do not invent universal CAN identifiers or timing values.
Compare 400V and 800V configurations with the same worksheet
Use the following fields for both candidates. A blank field is a request for evidence, not permission to assume that two versions behave alike.
HVCH voltage-matching review fields
| Review item |
Vehicle input |
Supplier confirmation |
| Steady-state supply |
Minimum, nominal and maximum at heater terminals |
Approved operating range for the exact configuration |
| Transient conditions |
Applicable vehicle requirements and test conditions |
Documented limits and validation evidence |
| Usable heating output |
Required heat and electrical allocation by operating mode |
Power map with voltage, coolant temperature and flow |
| Auxiliary supply |
Available low-voltage supply and mode availability |
Required supply range and startup behavior |
| Control interface |
Controller ownership and required command/fault behavior |
Protocol documentation and software revision |
| Configuration identity |
Intended build and installation constraints |
Part number, drawing revision and agreed exclusions |
Close the review with one of three decisions: compatible against the agreed requirements; conditionally acceptable with a documented restriction; or not yet demonstrated. “Not yet demonstrated” is useful when the missing item is a power curve or interface document. It avoids treating an unanswered question as either a pass or a definite incompatibility.
Make cold-weather operating modes explicit
For an overnight-parked truck, separate the departure preparation period from heating while driving. For a transit bus, separate battery conditioning from cabin demand and define their priorities if they compete for an electrical allocation. These are project scenarios to evaluate, not claims about a particular EVLINK installation.
Request supplier evidence at the conditions that matter to the project. A room-temperature rated point does not, by itself, answer a cold-start requirement. Likewise, evidence for one coolant flow condition should not be applied to a different loop without review. The HVCH coolant-flow and pressure-drop guide covers the hydraulic side of this check.
Keep the bench review within an approved test plan performed by qualified personnel. This article is a procurement and integration checklist, not an instruction to energize high-voltage equipment or override a protection function.
Questions buyers should settle before ordering
Can an 800V coolant heater work on a 400V supply?
Possibly, but the label alone cannot establish that. Confirm the permitted input range and the available heating output at the actual supply voltage for the exact part and software configuration. Operation within a stated range is not automatically proof of full rated output.
Can we replace a 400V heater with an 800V version?
Do not treat it as a drop-in change without review. Check electrical limits, auxiliary supply, controls, connectors, mounting, coolant requirements and vehicle validation. BorgWarner’s announcement of its 800V HVCH describes enhanced electronics alongside its existing 400V offering; it is not a universal interchangeability statement.
What if the datasheet does not show power at our minimum voltage?
Ask for a conditional power map or an agreed validation plan. State the voltage, coolant inlet condition, flow and requested output you need assessed. Keep selection provisional until the supplier confirms the requirement or documents a limitation your project can accept.
Send a voltage brief, not just “400V” or “800V”
Before requesting a configuration recommendation, prepare your terminal voltage envelope, required heating output, coolant conditions, auxiliary supply, communication requirements and operating modes. Include any available interface drawing and identify requirements that are still provisional.
Use the HVCH RFQ checklist to organize the remaining inputs, or send EVLINK your voltage and thermal brief for review. Request confirmation against the exact proposed model; do not use a family-level product image as evidence of 400V or 800V compatibility.